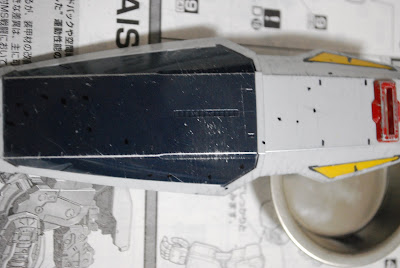


 Also finished dry brushing the shield.Scroll down and you'll see my master piece hahaha...


 Those black dots are marks for the bullet holes...B...E...A...UTIFUL
 Sorry for the blurry picture but this is not the end
 I still need to Improve the bulletholes so it looks like a real bullet holes rather than a melted plastic holes.Still need to paint the outline of the holes silver
 You know whats ironic about bullet holes is(for gundam).....it's not even a hole but a deep enough dent.Understand what i mean.Alright the secret to make nice bullet holes is not to make a hole but just a dent on the surface of your gundam or shield in this case


faris, how to apply dry brush?? i mean the colour combination, u use silver or silver chrome?? not very confident to make it on my next custom project..:-(
ReplyDeleteKaymaroo,sorry for the late reply man.
ReplyDeleteI use a Tamiya silver chrome
Hmmm...i usually use a paint brush with smooth brush with just enough paint that will stain the target area
heres a vid that will show you how
i use a similar technique like him
http://www.youtube.com/watch?v=vlQR5lna51M
i suggest u try on a 1/144 kit first
Good Luck on your project :)
my NG Dynames gonna be the first trial and the next custom project;-)
ReplyDelete